Android - How to build a service-enabled Android App - Part 2/3 Networking
👀 Watch Rust 🦀 live coding videos on our YouTube Channel.
Introduction #
I’ve written 3 tutorials to show you how to create a service enabled Android application that performs all of it’s network I/O in a background thread (not the UI thread). Please note that by service I mean web-service, not Android Service. These tutorials are split into three parts:
-
How to build a simple UI without using XML, by writing Java code to layout the UI.
-
How to use Apache HTTP Client to connect to services over HTTP or HTTPS and exchange serialized Java objects with services.
Connecting to services #
|
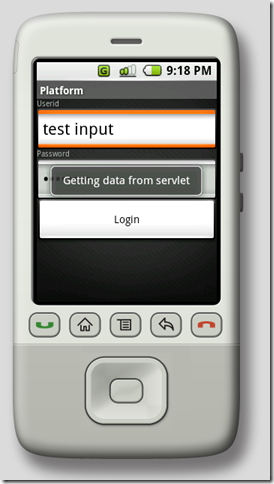
The NetworkActivity app simply connects to a service and sends it the userid and password that you type in this screen. These 2 strings are actually put into a Hashtable and then serialized and sent over HTTP POST to a servlet (DataPingServlet). Once the servlet gets this data, it sends another Hashtable back to the Android app, which is displayed on the following screen.Java object serialization can be a real time saver and productivity boost when sending data over HTTP. There's no need to serialize to/from XML for example. Despite it's convenience, there are some limitations to what can be done with Android's object serialization. |
|
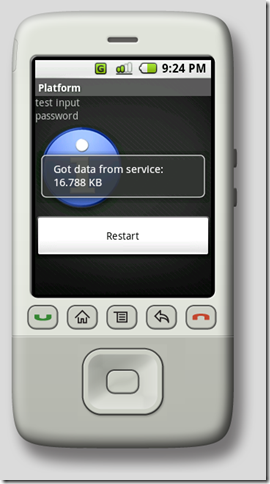
The DataPingServlet actually creates a new Hashtable, where DataKeys is just an enumeration. The userid and password strings that were passed to it are copied into this Hashtable. Additionally, a PNG file is loaded from the servlet's classpath (appimages.jar) and is added to the Hashtable as well.The byte[] of the PNG file is sent just to show the flexibility of Java object serialization between desktop/server Java and mobile Java (Android). There are limitations to what can be serialized, which is a problem at times; so it's not exactly like sending serialized objects between Java desktop/server VMs. However, the situation is far better than if you are working with JavaME.The DataKey enum was created just to show that Android object serialization supports Java 5 features. The Hashtable that's sent from the servlet to the Android app uses generics as well; this is to show generics support in Android. |
Using HTTP client #
The Apache HTTP Client 4 is included in the Android distribution, so there’s no need for you to download it and add it to your Android projects. Here is a tutorial on how to use this HTTP Client 4 library. Here’s the code that runs in the Android app (that sends the data to the servlet and processes it’s response):
/** this method is called in a non-"edt" thread */
private void _doInBackgroundPost() {
  Log.i(getClass().getSimpleName(), "background task - start");

  Hashtable<String, String> map = new Hashtable();
  map.put("uid", uid);
  map.put("pwd", pwd);

  try {
    HttpParams params = new BasicHttpParams();

    // set params for connection...
    HttpConnectionParams.setStaleCheckingEnabled(params, false);
    HttpConnectionParams.setConnectionTimeout(params, NetworkConnectionTimeout_ms);
    HttpConnectionParams.setSoTimeout(params, NetworkConnectionTimeout_ms);
    DefaultHttpClient httpClient = new DefaultHttpClient(params);

    // create post method
    HttpPost postMethod = new HttpPost(LoginServiceUri);

    // create request entity
    ByteArrayOutputStream baos = new ByteArrayOutputStream();
    ObjectOutputStream oos = new ObjectOutputStream(baos);
    oos.writeObject(map);
    ByteArrayEntity req_entity = new ByteArrayEntity(baos.toByteArray());
    req_entity.setContentType(MIMETypeConstantsIF.BINARY_TYPE);

    // associating entity with method
    postMethod.setEntity(req_entity);

    // RESPONSE
    httpClient.execute(postMethod, new ResponseHandler<Void>() {
      public Void handleResponse(HttpResponse response)
      throws ClientProtocolException, IOException {
        HttpEntity resp_entity = response.getEntity();
        if (resp_entity != null) {

          try {
            byte[] data = EntityUtils.toByteArray(resp_entity);
            ObjectInputStream ois =
                new ObjectInputStream(new ByteArrayInputStream(data));
            dataFromServlet = (Hashtable<DataKeys, Serializable>) ois.readObject();
            Log.i(getClass().getSimpleName(),
                "data size from servlet=" + data.toString());
            Log.i(getClass().getSimpleName(),
                "data hashtable from servlet=" + dataFromServlet.toString());
          }
          catch (Exception e) {
            Log.e(getClass().getSimpleName(),
                "problem processing post response", e);
          }

        }
        else {
          throw new IOException(
              new StringBuffer()
                  .append("HTTP response : ").append(response.getStatusLine())
                  .toString());
        }
        return null;
      }
    });

  }
  catch (Exception e) {
    ex = e;
//    Log.e(getClass().getSimpleName(), "problem encountered", e);
    StringWriter sw = new StringWriter();
    PrintWriter pw = new PrintWriter(sw);
    e.printStackTrace(pw);
    Log.e(getClass().getSimpleName(), sw.getBuffer().toString(), e);
  }

  Log.i(getClass().getSimpleName(), "background task - end");
}
The code is structured in the way that you see it due to threading requirements to not labor the UI thread. More on this in the next tutorial. Here’s the gist of what the code is doing:
-
It gets the userid and password strings and stuffs them in a Hashtable.
-
This Hashtable is serialized to a bunch of bytes using a ByteArrayOutputStream and ObjectOutputStream.
-
These bytes are sent to the servlet via HTTP POST using the Apache HTTP Core 4 libs.
-
The response from the servlet is read into a ObjectInputStream and then deserialized into a Hashtable, which is then displayed to the second screen.
Describe the servlet - DataPingServlet #
Here’s the code on the servlet that’s communicating with this app:
@Override protected void doPost(HttpServletRequest request,
                                HttpServletResponse res)
    throws ServletException, IOException
{

  ByteBuffer inputBB = new ByteBuffer(request.getInputStream());
  ByteBuffer outputBB = null;

  try {

    // extract the hashmap
    System.out.println("trying to extract hashtable from request");

    ObjectInputStream ois = new ObjectInputStream(
            inputBB.getInputStream());
    Hashtable<String, String> input =
            (Hashtable<String, String>) ois.readObject();
    System.out.println("got the uid/pwd from the client:" + input);

    Object retval = _processInput(input);
    System.out.println("created response hashtable, sending it back");

    ByteArrayOutputStream baos = new ByteArrayOutputStream();
    ObjectOutputStream oos = new ObjectOutputStream(baos);
    oos.writeObject(retval);

    outputBB = new ByteBuffer(baos.toByteArray());

    System.out.println("sent response back...");

  }
  catch (Exception e) {
    System.out.println(e);
    e.printStackTrace();
  }

  ServletOutputStream sos = res.getOutputStream();

  if (outputBB != null) {
    res.setContentType("application/octet-stream");
    res.setContentLength(outputBB.getSize());
    sos.write(outputBB.getBytes());
  }
  else {
    res.setContentType("application/octet-stream");
    res.setContentLength(inputBB.getSize());
    sos.write(inputBB.getBytes());
  }

  sos.flush();
  sos.close();

}

/** actually load PNG image and send it back */
private Hashtable<DataKeys, Serializable> _processInput(
        Hashtable<String, String> input) {

  Hashtable<DataKeys, Serializable> retval =
        new Hashtable<DataKeys, Serializable>();

  retval.put(DataKeys.str1, input.get("uid"));
  retval.put(DataKeys.str2, input.get("pwd"));

  try {
    InputStream is =
        getClass().getClassLoader().getResourceAsStream("information.png");
    if (is == null) System.out.println("is is null!");
    ByteBuffer bb = new ByteBuffer(is);
    retval.put(DataKeys.img1, bb.getBytes());
  }
  catch (IOException e) {
    System.out.println(e);
    e.printStackTrace();
  }

  return retval;

}
Here’s the gist of what this code does:
-
Gets a Hashtable from the Android app
-
Copies the 2 strings from this Hashtable to a new one of type Hashtable.
-
Loads a PNG file from the appimages.jar file and turns it into a byte[] using the servlet’s classloader.
-
Puts these bytes into the Hashtable and sends it back to the Android app. Note that the Hashtable itself is of course serializable.
Object serialization #
As you can see from the code, little to no effort has to be put into writing serialization/deserialization code if you use Java serialization. There are limitations to what can be serialized though. I ran into issues with certain classes that work just fine for desktop Java but throw various exceptions in Android (like method doesn’t exist, etc). So be sure to test your object exchange, before assuming that it should work because it does on desktop Java. Having said this, it’s impressive to see a mobile platform be able to exchange Java objects with desktop and server Java VMs.
Download source code #
To download the source code for this tutorial, click here. There are 3 folders in this zip file:
-
AndroidTest – This contains the Android UI and web service client code
-
ServiceTest – This contains the web service, or servlet code
-
SharedTest – This contains the code that is shared between the Android code and web service code.
📦 Install our useful Rust command line apps usingcargo install r3bl-cmdr(they are from the r3bl-open-core project):
- 🐱
giti: run interactive git commands with confidence in your terminal- 🦜
edi: edit Markdown with style in your terminalgiti in action
edi in action