Android Downloadable Fonts
![]()

- Using Google Fonts (programmatically, in XML)
- Getting started
- Doing it in XML
- Doing it in code
- Sample code
Using Google Fonts (programmatically, in XML) #
As of Android API level 27, there are too many ways to load custom fonts in Android apps. This article will show you how to use downloadable fonts (from Google Fonts) using the latest support library, which is very similar to the way one would use fonts in HTML and CSS.
Android Oreo introduced the use of
defining custom fonts in XML
that can be seamlessly used in your XML layout files. While this is a great feature, in order to use
it you have to set your minSdkVersion to Oreo. 😠
Android Support Library 26 takes this Oreo feature to the next level by adding the ability to download fonts from Google Fonts using Google Play Service. And it backports this feature to API versions 14 and higher! 👍
Getting started #
Here’s are some interesting links that you might want to reference before diving into the next sections.
- Learn how Android Downloadable Fonts work on developer.android.com. Read this to get an idea of how Android actually makes downloadable fonts work. Basically, these fonts are downloaded and cached for you by the system. You can use them declaratively in your XML layouts.
- Sample app that allows you to find a font and use it in and Android app on GitHub. Find out what fonts you can actually use in your app by running this sample. Note — just because a font is on Google Fonts doesn’t mean that it’s available via Google Play Services.
- Get an idea of the fonts you can download from Google Fonts.
- Read this great article about Android Typography on medium.
Doing it in XML #
Let’s walk thru how to use downloadable fonts using XML. The following are the rough steps you have to follow.
Step 1 - Create XML files for fonts #
For each downloadable font, you have to create an XML file in res/fonts that contains the query to
get your downloadable font. Here’s an
example.
<font-family xmlns:app="http://schemas.android.com/apk/res-auto"
       app:fontProviderAuthority="com.google.android.gms.fonts"
       app:fontProviderPackage="com.google.android.gms"
       app:fontProviderQuery="name=Poppins&weight=300"
       app:fontProviderCerts="@array/com_google_...">
</font-family>
Step 2 - Create an array of the font XML files #
Make an array that holds all the font XML files that you’ve created. Here’s an example.
<resources>
   <array name="preloaded_fonts" translatable="false">
       <item>@font/poppins</item>
   </array>
</resources>
Step 3 - Update your manifest #
In your AndroidManifest.xml file you have create a meta-data element that tells Android to
preload all the fonts that you have declared in your custom fonts in your res/fonts folder. Here’s
an
example.
<meta-data
   android:name="preloaded_fonts"
   android:resource="@array/preloaded_fonts" />
Step 4 - Update gradle #
Add the support library dependency to your build.gradle
file.
dependencies {
    compile "com.android.support:support-compat:27.0.2"
}
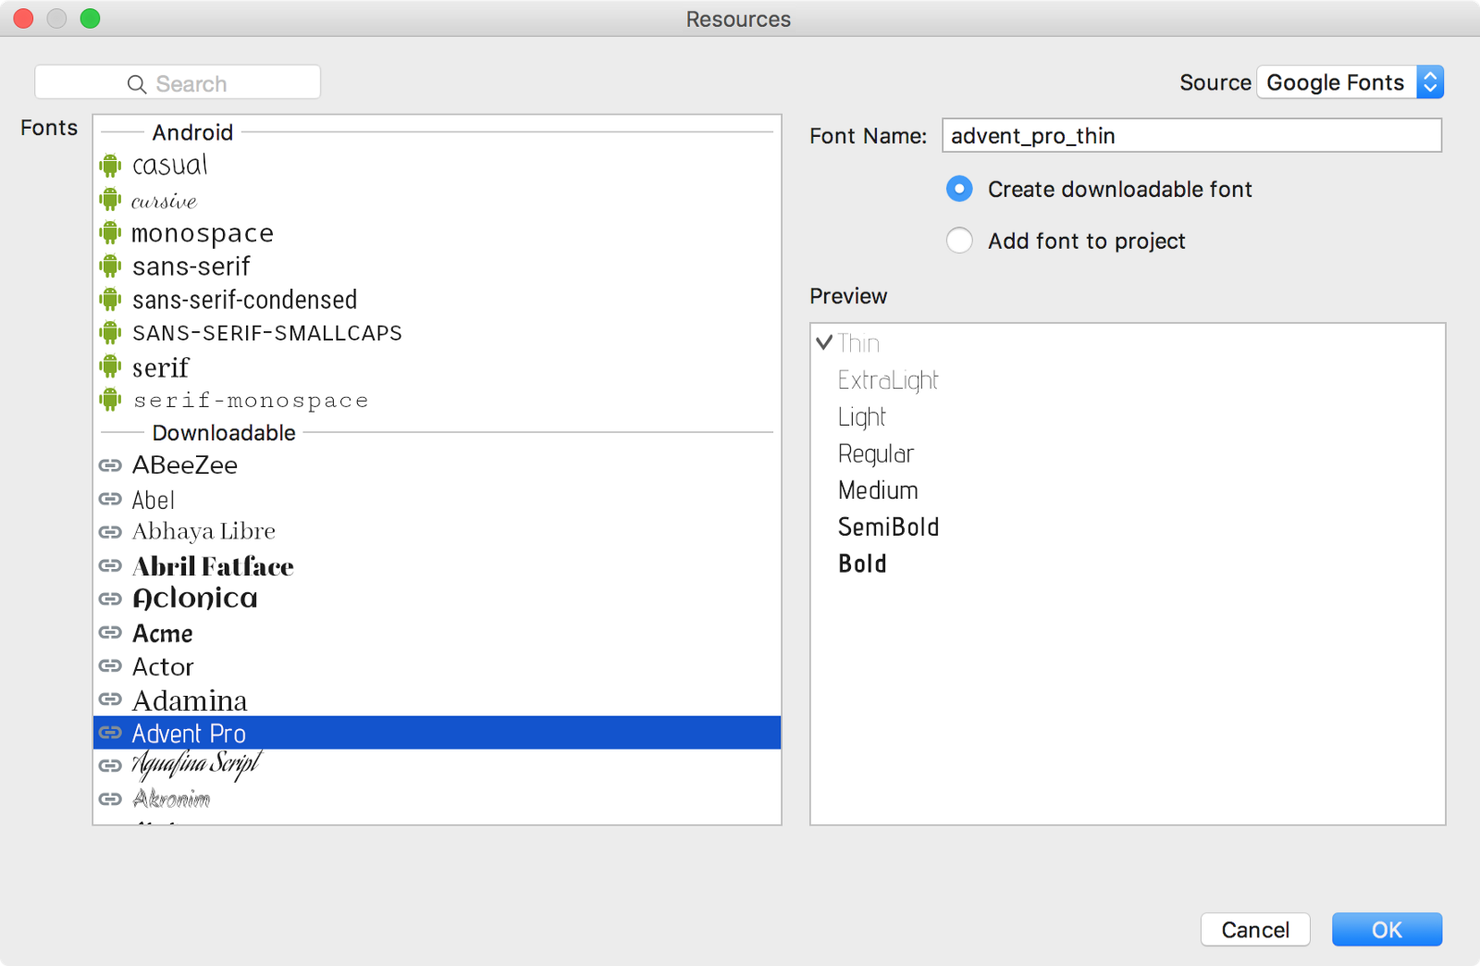
The simplest way to get all this setup is to use Android Studio to import Google Fonts, as this will setup all of this you (and even more, such as the font provider certificates that you will need). Here’s a link to get started with this in Android Studio.
Once this is setup you can use font assets in your XML layouts. Here’s an example.
<TextView xmlns:android="http://schemas.android.com/apk/res/android"
   android:id="@android:id/text1"
   android:layout_width="match_parent"
   android:layout_height="wrap_content"
   android:gravity="center_vertical"
   android:textSize="15sp"
   android:fontFamily="@font/poppins" />
Doing it in code #
Declaring fonts in XML and using them in XML layouts is great. However, there are certain situations
where you might have to apply fonts programmatically in order to use them in certain UI elements. An
example of this is using styled text in a Toolbar.
To load downloadable fonts programmatically, the process is quite different from the approach outlined above. First you must have a query string that points to the exact font you want to download, and the weight, and style. More info on this is on developers.android.com. Here’s an example.
String query = "name=Open Sans&weight=800&italic=0";
Next, you will have to create a FontRequest, where you pass the query to Google Play Services.
When it resolves this request, you will get a callback with a Typeface object that you can apply
to your UI views. Here’s an
example.
FontRequest request =
       new FontRequest(
               "com.google.android.gms.fonts",
               "com.google.android.gms",
               query,
               R.array.com_google_android_gms_fonts_certs);

FontsContractCompat.FontRequestCallback callback =
       new FontsContractCompat.FontRequestCallback() {
           @Override
           public void onTypefaceRetrieved(Typeface typeface) {
               mTarget.applyFont(typeface);
           }
       };

FontsContractCompat.requestFont(
        mContext,
        request,
        callback,
        getHandlerThreadHandler());
Here’s an
example
that puts this together with setting a custom title on a Toolbar.
private void setupAppBar() {
   Toolbar appBar = findViewById(R.id.appbar);
   setSupportActionBar(appBar);

   final String titleString = getString(R.string.app_name);

   // WITHOUT FONT
   getSupportActionBar().setTitle(titleString);

   // WITH FONT
   new FontDownloader(
           this,
           typeface -> {
               setFormattedTitle(titleString, typeface);
           });

}
Here’s how a SpannableString is used to style the text with this downloaded typeface (using
MyTypefaceSpan
class).
private void setFormattedTitle(String titleString,
                               Typeface typeface) {
   SpannableString spannableString =
           new SpannableString(titleString);
   spannableString.setSpan(
           new MyTypefaceSpan(this, typeface),
           0,
           spannableString.length(),
           Spannable.SPAN_EXCLUSIVE_EXCLUSIVE);
   getSupportActionBar().setTitle(spannableString);
}
Sample code #
You can get the sample code on GitHub.
👀 Watch Rust 🦀 live coding videos on our YouTube Channel.
📦 Install our useful Rust command line apps usingcargo install r3bl-cmdr(they are from the r3bl-open-core project):
- 🐱
giti: run interactive git commands with confidence in your terminal- 🦜
edi: edit Markdown with style in your terminalgiti in action
edi in action